How do I set up a static IP address?
Setting up a static IP address involves configuring your computer or device to use a fixed IP address rather than obtaining one automatically through DHCP (Dynamic Host Configuration Protocol). Here are the steps to set up a static IP address on a Windows 10 computer:
Open Network Settings:
- Press the
Windowskey on your keyboard or click on the Windows icon in your taskbar to open the Start menu.
- Press the
Access Network Settings:
- Type "Network Settings" into the search bar and press
Enter. - Alternatively, you can access this through the Control Panel. Open the Control Panel by typing "Control Panel" in the search bar and pressing
Enter, then navigate to "Network and Sharing Center" or "Network and Internet" and select "Network and Sharing Center."
- Type "Network Settings" into the search bar and press
View Network Adapters:
- In the Network settings or Network and Sharing Center, look for "Change adapter settings" on the left-hand side. Click on it to view your network adapters.
Identify Your Network Connection:
- You will see a list of network connections, including Ethernet and Wi-Fi (Wireless) adapters. Identify the network adapter for which you want to set up a static IP address.
Access Adapter Properties:
- Right-click on the network adapter for which you want to set a static IP address (e.g., Ethernet or Wi-Fi) and select "Properties."
Select Internet Protocol Version 4 (TCP/IPv4):
- In the Properties window, find and select "Internet Protocol Version 4 (TCP/IPv4)." Click on it to highlight it.
Configure the Static IP Address:
- Click the "Properties" button below the list of items.
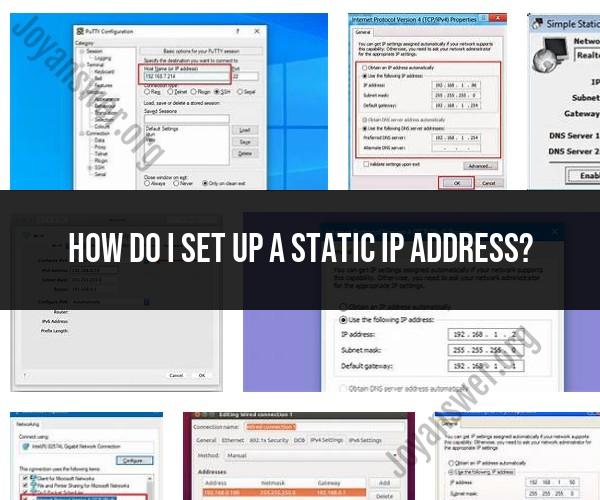
- In the IPv4 Properties window that opens, select the option that says "Use the following IP address."
Enter IP Address Information:
- Now, enter the static IP address, subnet mask, and default gateway information. These details should be provided to you by your network administrator or ISP. If you're configuring a home network, you may need to refer to your router's settings for the appropriate values.
- Typically, the DNS server addresses can be set to "Obtain DNS server address automatically" or you can enter specific DNS server addresses provided by your ISP or network administrator.
Save and Close:
- Click the "OK" button to save the changes and close the properties windows.
Restart or Renew DHCP Lease (Optional):
- In some cases, you may need to restart your computer or renew the DHCP lease on your network adapter for the changes to take effect.
That's it! You've successfully configured a static IP address for your Windows 10 computer. Keep in mind that using a static IP address is useful in specific situations, such as when you need to set up port forwarding for a network service or when you want to ensure that a particular device always has the same IP address on your local network. However, it's essential to use the correct IP address settings to avoid network conflicts.