How do you scan a document into Excel?
Scanning a document into Excel involves a two-step process. First, you need to scan the document to create a digital image, and then you can use Optical Character Recognition (OCR) software to convert the scanned image into editable text that can be imported into Excel. Here's a step-by-step guide:
Step 1: Scan the Document
Place Document in Scanner:Load your document into a scanner.
Open Scanner Software:Open the scanning software that came with your scanner or use a third-party scanning application on your computer.
Select Scan Settings:Adjust scan settings such as color, resolution, and file format. For OCR purposes, it's recommended to choose a higher resolution and a format that supports text recognition, such as PDF.
Start Scanning:Initiate the scanning process. The scanner will create a digital image of the document.
Save Scanned Image:Save the scanned image to your computer in a format such as PDF or TIFF.
Step 2: Use OCR Software
A. Using Adobe Acrobat:
Open Adobe Acrobat:Open Adobe Acrobat on your computer.
Open Scanned Document:Click on "File" and then "Open" to open your scanned PDF document.
Run OCR:In Adobe Acrobat, go to "Tools" > "Enhance Scans" > "Recognize Text" > "In This File." This will initiate the OCR process.
Save as PDF:Save the document with OCR as a PDF file.
B. Using Online OCR Services:
Choose an Online OCR Service:There are several online OCR services available, such as Google Drive, Smallpdf, or OnlineOCR.net. Choose one that suits your needs.
Upload the Scanned Document:Upload your scanned document to the selected OCR service.
Run OCR:Initiate the OCR process through the service. This may involve clicking a button like "Start OCR" or a similar option.
Download the Recognized Text:Once OCR is complete, download the recognized text as a text file or PDF.
Step 3: Import into Excel
Open Excel:Open Microsoft Excel on your computer.
Open a New Worksheet:Open a new worksheet in Excel where you want to import the data.
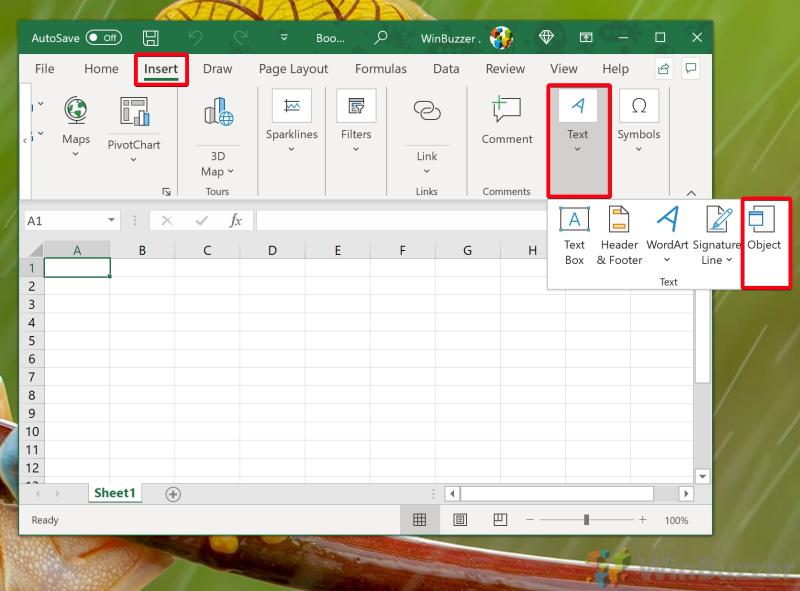
Data Tab:Go to the "Data" tab in the Excel ribbon and select "Get Data" or "Get External Data."
From Text or File:Choose the option that allows you to import data from a text file. This option may be named "From Text" or "From File."
Select Text or PDF File:Navigate to the location where you saved the OCR-processed text file or PDF and select it. Click "Import."
Text Import Wizard:Follow the steps in the Text Import Wizard to specify delimiters and adjust the format if needed. Click "Finish" to complete the import.
Review and Adjust Data:The imported data will now appear in Excel. Review and adjust the data as necessary, ensuring proper column alignment and structure.
Keep in mind that the success of the OCR process depends on the clarity of the scanned document and the OCR software or service used. Manual adjustments may be required in Excel if the document is complex or contains special formatting. Additionally, the steps may vary slightly depending on the version of Excel and the OCR tool you choose.
How do you scan a document and import it into Excel?
To scan a document and import it into Excel, you can follow these steps:
Connect your scanner to your computer and turn it on.
Open Excel and create a new spreadsheet.
Click the Data tab and then click the Get External Data button.
Select the From Scanner or Camera option and click the OK button.
In the Select Device dialog box, select your scanner and click the OK button.
In the Import Data dialog box, select the Table option and click the Next button.
In the Scan Range dialog box, select the area of the document that you want to scan and click the OK button.
Excel will scan the document and import the data into the spreadsheet.
Once the data has been imported, you can review and edit it as needed.
What are the steps for scanning a document and converting it into an Excel file?
To scan a document and convert it into an Excel file, you can follow these steps:
Connect your scanner to your computer and turn it on.
Open your scanner software and scan the document.
Once the document has been scanned, save it as a PDF file.
Open Excel and click the Data tab.
Click the Get Data button and then select the From File option.
Select the PDF file that you saved in step 3 and click the Import button.
In the Text Import Wizard dialog box, select the Delimited option and click the Next button.
In the Delimited Data dialog box, select the Comma option as the delimiter and click the Finish button.
Excel will import the data from the PDF file into a new spreadsheet.
Are there specific settings or considerations for scanning documents into Excel?
Yes, there are a few specific settings and considerations for scanning documents into Excel:
- Scan resolution: When scanning the document, use a scan resolution of at least 300 dpi. This will ensure that the text is clear and easy to read.
- Document orientation: Make sure that the document is oriented correctly on the scanner bed. If the document is not oriented correctly, the data may be imported into Excel incorrectly.
- Document formatting: If the document contains any complex formatting, such as tables, columns, or images, it is best to convert the document to a PDF file before importing it into Excel. This will help to ensure that the formatting is preserved.
- Excel import settings: When importing the data into Excel, be sure to select the correct delimiter. If the data is separated by commas, select the Comma option as the delimiter. If the data is separated by tabs, select the Tab option as the delimiter.
If you are having any trouble scanning a document and importing it into Excel, please consult the documentation for your scanner or Excel.