How to create your own Minecraft mod?
Creating your own Minecraft mod can be a rewarding and creative experience, but it requires some programming knowledge and familiarity with the Minecraft modding environment. Here's a simplified step-by-step guide to get you started on creating a basic Minecraft mod using the Minecraft Forge modding platform:
1. Install Java Development Kit (JDK):
- Ensure you have the Java Development Kit (JDK) installed on your computer. Minecraft modding is typically done using Java, so you'll need Java development tools.
2. Download Minecraft Forge:
- Go to the Minecraft Forge website (https://files.minecraftforge.net/) and download the recommended version of Forge that matches your Minecraft version. Forge is a modding platform that makes it easier to create and run Minecraft mods.
3. Install Minecraft Forge:
- Run the Forge installer that you downloaded in the previous step. Follow the installation instructions, and make sure to select the "Install client" option. This will create a new Forge profile in your Minecraft Launcher.
4. Set Up Your Modding Workspace:
- Create a new directory on your computer where you'll work on your mod. This will be your modding workspace.
5. Download a Code Editor:
- You'll need a code editor to write your mod's Java code. Popular choices include Eclipse, IntelliJ IDEA, and Visual Studio Code. Install your preferred code editor.
6. Create Your Mod Project:
- Open your code editor and create a new Java project. Configure the project to use the same Java version as your Minecraft version.
7. Write Your Mod Code:
- Start writing your mod's code in Java. You'll need to learn the basics of Minecraft modding, including creating blocks, items, and custom behavior. Forge's documentation and community tutorials can be invaluable resources.
8. Test Your Mod:
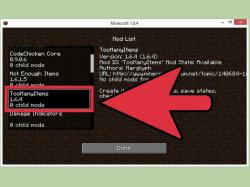
- Save your code and build your mod. This will generate a .jar file containing your mod. Copy this .jar file to the "mods" folder in your Minecraft directory (usually located in the ".minecraft" folder). Launch Minecraft using the Forge profile, and your mod should be available for testing.
9. Debug and Refine:
- Test your mod thoroughly to ensure it works as intended. Debug any issues that arise and refine your mod's features.
10. Publish Your Mod (Optional):- If you're happy with your mod and want to share it with others, you can publish it on platforms like CurseForge. Be sure to provide documentation, descriptions, and proper credits if you use any assets or code from others.
11. Keep Learning:- Minecraft modding is a continuous learning process. As you gain more experience, you can explore advanced topics and create more complex mods.
Remember that creating Minecraft mods can be complex, and it may take time to become proficient. Be patient, refer to documentation and tutorials, and seek help from the Minecraft modding community when needed. Additionally, stay updated with the latest versions of Minecraft Forge and Minecraft to ensure your mods remain compatible with the game.
