How to completely reset a Dell laptop?
Performing a full reset on a Dell laptop involves two main options: a factory reset and a Windows reset. The steps may vary slightly depending on the specific model and the version of Windows installed on your laptop. Here are general guidelines for both options:
Factory Reset:
Note:
This procedure will remove all data on your laptop, so make sure to back up important files before proceeding.
- Turn off your Dell laptop.
- Turn it back on and immediately start pressing the F8 key repeatedly until you see the Advanced Boot Options menu.
- Select "Repair Your Computer" using the arrow keys and press Enter.
- Choose your language and log in with an account that has administrative privileges.
- In the System Recovery Options, select "Dell Factory Image Restore" or a similar option, depending on your laptop model.
- Follow the on-screen instructions to initiate the factory reset process.
- Allow the process to complete. This may take some time.
After the factory reset, your Dell laptop will be restored to its original factory settings, similar to how it was when you first bought it.
Windows Reset:
Note:
This option allows you to reset Windows without affecting your personal files. However, installed apps and settings will be removed.
- Open the Start menu and select "Settings" (gear icon).
- Go to "Update & Security" > "Recovery."
- Under "Reset this PC," click on "Get started."
- Choose either "Keep my files" or "Remove everything" depending on your preference.
- If you select "Remove everything," you'll be prompted to either "Just remove my files" or "Remove files and clean the drive." Choose the option that suits your needs.
- Follow the on-screen instructions to complete the reset process.
This Windows reset will reinstall Windows and remove all apps that did not come with your PC, settings changes, and any drivers you installed. Your personal files will be preserved if you selected the "Keep my files" option.
Remember to back up important data before initiating either of these resets. If your Dell laptop has a specific recovery partition or a recovery media (DVDs or USB), you can also use those for a factory reset. For detailed and model-specific instructions, you may want to refer to the user manual or support documentation provided by Dell for your particular laptop model.
What steps are involved in performing a complete reset of a Dell laptop?
Performing a complete reset on your Dell laptop involves two main methods: using the built-in recovery options or using a bootable recovery image. Here's a breakdown of both methods:
Using the built-in recovery options:
1. Backup your data: This is the most crucial step. Ensure you have backed up all your important data to an external storage device like a USB drive or cloud storage as the reset will erase everything from your hard drive.
2. Access the recovery environment:
- Windows 11/10:
- Turn off your laptop.
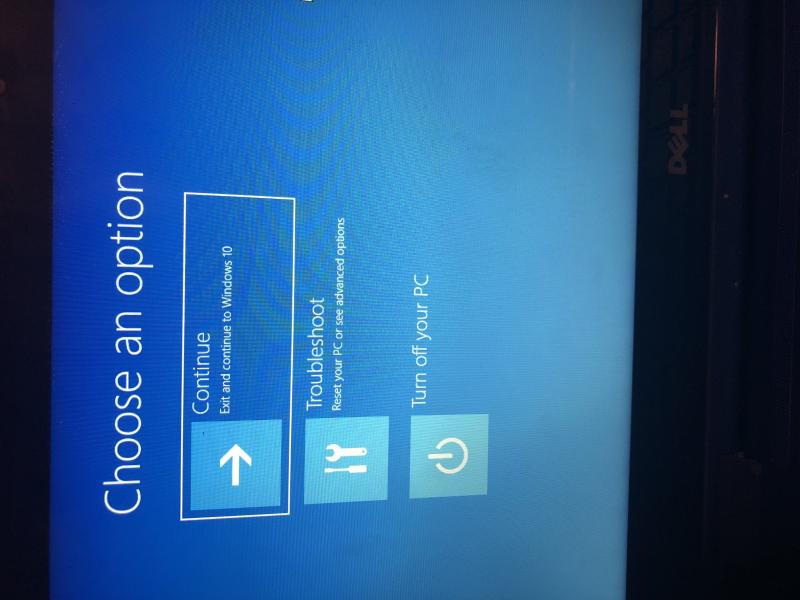
- Press and hold the power button until the Dell logo appears, then immediately press and hold the "Shift" key while selecting "Restart" from the menu.
- This will boot your laptop into the Advanced Startup options.
- Select "Troubleshoot" > "Reset this PC" > "Remove everything" to begin the reset process.
- Windows 8/7:
- Turn on your laptop and press "F8" repeatedly during the startup process before the Windows logo appears.
- This will open the Advanced Boot Options menu.
- Select "Repair your computer" and follow the on-screen instructions to access the System Recovery Options.
- Choose "Dell Factory Image Restore" to begin the reset process.
3. Choose a reset option:
- Keep my files: This option will remove all apps and settings but will retain your personal files.
- Remove everything: This option will erase everything from your hard drive, including your personal files, apps, and settings.
4. Follow the on-screen instructions: The reset process may take some time depending on the speed of your computer and the amount of data on your hard drive.
5. Set up your laptop: Once the reset is complete, you'll need to set up your laptop again, including choosing your language, creating a user account, and reinstalling your preferred software.
Using a bootable recovery image:
1. Create a bootable USB drive:
- Download the Dell Recovery Image for your specific laptop model from the Dell website.
- Use a tool like Microsoft's Media Creation Tool to create a bootable USB drive with the recovery image.
2. Boot from the USB drive:
- Insert the USB drive into your laptop and restart it.
- Press the appropriate key (often F12 or F10) during the startup process to access the boot menu.
- Select the USB drive as the boot device.
3. Follow the on-screen instructions: The recovery process will guide you through reimaging your laptop's hard drive.
4. Set up your laptop: Once the reimaging is complete, you'll need to set up your laptop again, similar to the built-in recovery process.
Here are some additional resources that you might find helpful:
- Dell Factory Image Restore: https://www.dell.com/support/kbdoc/en-us/000124401/how-to-restore-the-dell-factory-image-with-dell-backup-and-recovery
- Create a Dell Recovery Image: https://www.dell.com/support/kbdoc/en-us/000123667/how-to-download-and-use-the-dell-os-recovery-image-in-microsoft-windows
- Microsoft Media Creation Tool: https://www.microsoft.com/software-download/windows10
Remember, performing a complete reset will erase all data from your laptop. Ensure you have backed up your important files before proceeding. If you're unsure about any steps, contact Dell support for assistance.


