How do you install mods on Sims 3?
Installing mods in "The Sims 3" allows you to customize and enhance your gameplay experience. Follow these step-by-step instructions to install mods in "Sims 3":
Note: Before you begin, make sure you have a clean and backup copy of your game, as modding can sometimes cause issues. Also, ensure you have the necessary expansion packs and a basic understanding of file management.
Find Mods:
- Start by finding mods you want to install. You can find mods on various websites and forums dedicated to "Sims 3" modding. Popular modding websites include Mod The Sims, The Sims Resource, and NRaas Industries.
Download Mods:
- Download the mod files you want to install. Mods usually come in the form of .package or .sims3pack files. Be sure to download mods that are compatible with your game version and expansion packs.
Unzip/Extract Files (if necessary):
- If the mod files are compressed in a .zip or .rar file, you'll need to extract them using a file extraction program like WinRAR or 7-Zip. Extract the contents to a folder on your computer where you can easily locate them.
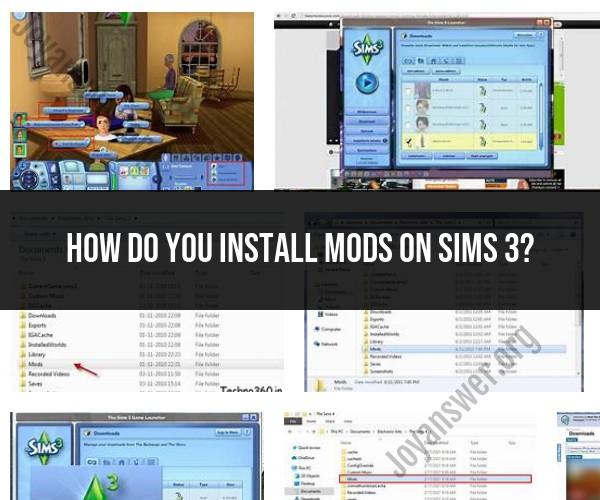
Navigate to the Mods Folder:
- "The Sims 3" uses a specific folder for mods. The location of this folder may vary depending on your operating system. The default locations are:
- Windows: Documents > Electronic Arts > The Sims 3 > Mods
- Mac: Documents > Electronic Arts > The Sims 3 > Mods
- "The Sims 3" uses a specific folder for mods. The location of this folder may vary depending on your operating system. The default locations are:
Create a Packages Folder (if it doesn't exist):
- Inside the "Mods" folder, create a subfolder named "Packages" if it doesn't already exist. This is where you'll place your .package files.
Install Mods:
- Copy the downloaded .package files (or extracted files if applicable) and paste them into the "Packages" folder within the "Mods" directory. Make sure not to place them inside any subfolders.
Enable Custom Content in the Game:
- Launch "Sims 3."
- In the main menu, click on "Options," then select "Game Options."
- Under the "Other" tab, check the "Enable Custom Content and Mods" option. Also, make sure the "Script Mods Allowed" option is enabled if you're using script-based mods.
- Click "Apply Changes" and then "Accept."
Restart the Game:
- Exit "Sims 3" completely and then relaunch the game.
Check if Mods Are Working:
- In the game, go to the "Options" menu.
- Under "Game Options," check the "Enable Custom Content and Mods" box.
- Restart the game again.
Load or Start a Game:
- Start a new game or load an existing one. The installed mods should now be available in your game.
Manage Mods:
- Use the "Mods" tab in the game's main menu to manage and organize your installed mods. From there, you can enable, disable, or delete mods as needed.
Remember that some mods may conflict with each other or with certain expansion packs. It's a good practice to read the mod descriptions and any compatibility notes provided by the mod creators to avoid potential issues. If you experience problems with your game after installing mods, you may need to troubleshoot and identify the conflicting mods or remove them.
Modding The Sims 3: A Step-by-Step Guide to Installation
To install mods in The Sims 3, follow these steps:
- Download the mods you want to install. There are many different websites where you can find Sims 3 mods, such as Mod The Sims and The Sims Resource.
- Extract the mod files from the downloaded archive. Most mods come in .zip or .rar format, so you will need to use a file extraction program such as WinZip or 7-Zip to extract the files.
- Move the extracted mod files to the Mods folder in your Sims 3 game directory. The Sims 3 game directory is typically located at:
Documents\Electronic Arts\The Sims 3
- Enable mods in your Sims 3 game. To do this, start The Sims 3 launcher and click on the Game Options button. In the Game Options menu, click on the Other tab and check the box next to Allow Custom Content and Mods.
- Restart The Sims 3 game.
Your mods should now be installed and ready to use.
Personalizing Your Sims 3 Game: How to Install Mods
Mods can be used to personalize your Sims 3 game in a variety of ways. For example, you can use mods to:
- Add new clothing, hairstyles, and accessories to your Sims
- Add new furniture, objects, and decorations to your Sims' homes and lots
- Change the appearance of the Sims world
- Add new gameplay features, such as new careers, activities, and social interactions
Expanding Gameplay: Adding Mods to The Sims 3
Mods can also be used to expand the gameplay of The Sims 3. For example, you can use mods to:
- Add new careers, such as a doctor, lawyer, or teacher
- Add new activities, such as fishing, hiking, or camping
- Add new social interactions, such as flirting, arguing, or fighting
- Add new challenges, such as surviving in the wilderness or building a successful business
Conclusion
Mods can be a great way to personalize and expand the gameplay of The Sims 3. However, it is important to note that mods can sometimes cause conflicts with each other or with the base game. If you experience any problems after installing a mod, be sure to remove the mod and try again.
Here are some additional tips for modding The Sims 3:
- Only install mods from reputable websites.
- Read the mod descriptions carefully before installing them.
- Install mods one at a time to avoid conflicts.
- Back up your game files before installing any mods.
- Remove any mods that are causing problems.
By following these tips, you can enjoy the benefits of modding without any of the headaches.


