How do I create a customer database in Excel?
Creating a customer database in Excel involves organizing and storing customer information in a structured manner. Here's a step-by-step guide to help you create a basic customer database:
Open Excel: Launch Microsoft Excel on your computer.
Create a New Workbook:
- Click on "File" or the Office button (depending on your Excel version).
- Select "New" or "New Workbook" to create a blank Excel workbook.
Set Up Column Headers:
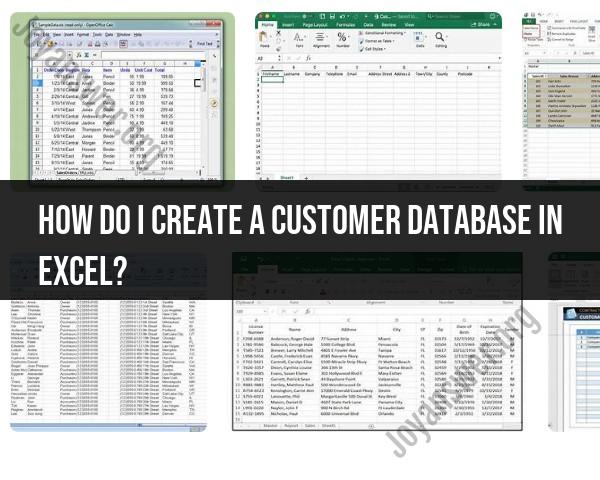
- In the first row (Row 1), create column headers for different customer information. Common headers might include:
- First Name
- Last Name
- Email Address
- Phone Number
- Address
- City
- State/Province
- ZIP/Postal Code
- Country
- Date of Birth
- Customer ID (if applicable)
- Notes (for additional information)
- In the first row (Row 1), create column headers for different customer information. Common headers might include:
Enter Customer Data:
- Start entering customer data in the rows below the headers. Each row represents a single customer, and each column holds specific customer details.
Format the Data:
- Format the data to make it easier to read and search. You can apply borders, shading, and fonts to differentiate the header row from the data rows.
Sort and Filter Data:
- Use the "Sort" and "Filter" options in Excel to organize and find specific customer records easily. This is helpful when you have a large customer database.
Data Validation (Optional):
- You can set up data validation rules to ensure that the data entered is consistent and accurate. For example, you can restrict the format of phone numbers or email addresses.
Data Entry Guidelines:
- Establish guidelines for data entry to ensure uniformity. For instance, decide on a standard date format or how to handle missing information.
Back Up Your Database:
- Regularly save and back up your customer database to prevent data loss.
Data Security:
- If your customer database contains sensitive information, take steps to secure the file. You can password-protect the Excel file or consider more advanced security measures.
Data Maintenance:
- Periodically review and update your customer database to ensure that it stays accurate and up to date. Remove duplicates and outdated records as needed.
Using Excel Functions (Optional):
- You can use Excel functions for various purposes, such as calculating customer age based on the date of birth or generating customer IDs automatically.
Data Analysis (Optional):
- Excel offers various tools for data analysis. You can create charts, pivot tables, and use other features to gain insights from your customer data.
Create Reports (Optional):
- If you want to generate reports from your customer database, you can use Excel's reporting features or export the data to other software for more advanced reporting.
Documentation:
- Keep a document that explains the structure of your customer database, data entry guidelines, and any other important information for anyone who needs to work with the database.
Remember to comply with any relevant data protection regulations and ensure that you have the necessary permissions to store and process customer data in Excel. Always prioritize data privacy and security when creating and managing a customer database.
How to create a customer database in Excel for effective data management
- Identify your customer data needs. What customer information do you need to collect and manage? This could include name, contact information, purchase history, preferences, and more.
- Set up a spreadsheet framework. Create a new Excel spreadsheet and enter column headers for each piece of customer information you want to collect. For example, you might have columns for customer name, email address, phone number, and purchase history.
- Enter your customer data. You can manually enter your customer data into the spreadsheet, or you can import it from another source, such as a CRM system or email marketing platform.
- Convert your data into a table. This will make it easier to manage and analyze your customer data. To convert your data into a table, select the entire data range and click the Insert > Table button.
- Format the table. You can customize the appearance of your table by adding borders, colors, and other formatting. You can also add filters and sorting to your table to make it easier to find the information you need.
Organizing and structuring data in Excel to build a customer database
Here are some tips for organizing and structuring your customer data in Excel:
- Use descriptive column headers. This will make it easier to understand and use your data.
- Use consistent data formats. For example, format all phone numbers in the same way.
- Use unique identifiers for each customer record. This could be a customer number, email address, or other unique identifier.
- Normalize your data. This means storing each piece of data in only one place. For example, instead of storing a customer's full name in multiple columns, store it in a single column.
- Use data validation to ensure that your data is accurate. For example, you can use data validation to ensure that all email addresses are entered in a valid format.
Data entry and validation techniques for maintaining a clean and accurate database
Here are some tips for maintaining a clean and accurate customer database in Excel:
- Use data validation to ensure that data is entered correctly. For example, you can use data validation to ensure that all phone numbers are entered in a valid format.
- Use formulas to automate data entry and calculations. For example, you can use formulas to calculate a customer's total purchase amount or their average order value.
- Use conditional formatting to highlight errors or unusual data. For example, you can use conditional formatting to highlight all customer records with a missing email address.
- Regularly review your data for errors and inconsistencies.
Analyzing customer data and generating insights using Excel
Excel has a number of powerful tools for analyzing customer data and generating insights. Here are a few examples:
- Use pivot tables to summarize and analyze your data. Pivot tables allow you to group your data in different ways and see how it changes.
- Use charts and graphs to visualize your data. Charts and graphs can help you to identify trends and patterns in your data that you might not have noticed otherwise.
- Use statistical functions to calculate metrics such as average order value, customer lifetime value, and customer churn rate.
Security and privacy considerations when handling customer data in Excel
It is important to take steps to protect the security and privacy of your customer data in Excel. Here are a few tips:
- Use a password to protect your Excel spreadsheet.
- Only share your Excel spreadsheet with authorized users.
- Be careful when sharing your Excel spreadsheet via email or other online platforms.
- Consider using encryption to protect your data at rest and in transit.
By following these tips, you can create and manage a customer database in Excel that is effective, efficient, and secure.


