How to set an out of office message in outlook?
Setting an out-of-office message in Outlook is a useful way to let people know that you are unavailable and provide them with information about when you will be back. Here's a step-by-step guide on how to set an out-of-office message in Outlook:
Note: The exact steps may vary slightly depending on the version of Outlook you are using, but the general process is similar.
For Outlook Desktop App (Windows):
Open Microsoft Outlook on your computer.
Click on the "File" tab in the top-left corner of the Outlook window.
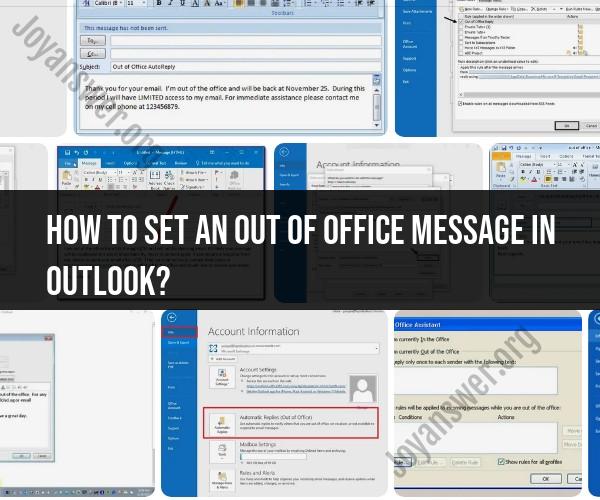
Click on "Automatic Replies (Out of Office)" (or "Out of Office Assistant" in older versions).
In the Automatic Replies dialog box, check the box that says "Send automatic replies."
You can then set the following options:
- Inside My Organization: This message will be sent to people within your organization.
- Outside My Organization: This message will be sent to people outside your organization.
- During this time range: Specify the start and end dates and times for your out-of-office period.
Enter your out-of-office message in the text box under "Send automatic replies." You can create separate messages for internal and external senders if you prefer.
Optionally, you can check the box that says "Send replies only during this time period" and specify the times you want the automatic replies to be sent.
Click "OK" to save your settings.
For Outlook Web App (Outlook on the Web):
Go to the Outlook Web App (OWA) by visiting the Outlook website (https://outlook.office365.com/) and logging in with your Outlook email and password.
Click the gear icon (Settings) in the upper-right corner of the OWA window.
In the Settings pane, scroll down and click on "View all Outlook settings" at the bottom.
In the settings menu on the left, select "Mail" and then click on "Automatic replies."
Toggle the switch to turn on automatic replies.
You can then set the following options:
- Send replies to: Choose whether to send automatic replies to people inside your organization or outside your organization.
- During this time range: Specify the start and end dates and times for your out-of-office period.
Enter your out-of-office message in the text box. You can create separate messages for internal and external senders if you prefer.
Optionally, you can check the box that says "Send replies only during this time period" and specify the times you want the automatic replies to be sent.
Click "Save" to save your settings.
Once you have set your out-of-office message, Outlook will automatically send it to incoming emails based on the specified criteria and time range. Be sure to turn off the automatic replies when you return to work by following the same steps and selecting "Don't send automatic replies."
Setting an Out of Office Message in Outlook: Step-by-Step Guide
To set an out of office message in Outlook, follow these steps:
- Open Outlook.
- Click the File tab.
- Click Automatic Replies.
- In the Automatic Replies dialog box, select the Send automatic replies checkbox.
- On the Inside My Organization tab, type your out of office message.
- Optionally, you can set a date range for your out of office message.
- Click OK to save your changes.
Managing Your Email Absence: Creating an Outlook Out of Office Message
An out of office message is a great way to manage your email absence and let people know that you are not available to respond to their messages. When creating an out of office message, it is important to be clear and concise. You should also include the following information:
- Your name
- Your job title
- Your department
- The dates that you will be out of office
- How people can reach you in an emergency
Automated Responses: Setting Up an Out of Office Message in Outlook
Setting up an out of office message in Outlook is a simple and easy way to automate your email responses. By following the steps above, you can create an out of office message that will let people know that you are not available to respond to their messages and provide them with the information they need to contact you in an emergency.
Here are some additional tips for creating an effective out of office message:
- Be clear and concise. Your message should be easy to read and understand.
- Be specific about when you will be out of office and how people can reach you in an emergency.
- Personalize your message. Add a personal touch to your message by including your name, job title, and department.
- Test your message. Send a test message to yourself to make sure that your out of office message is working properly.
By following these tips, you can create an out of office message that will help you manage your email absence and let people know that you are not available to respond to their messages.


