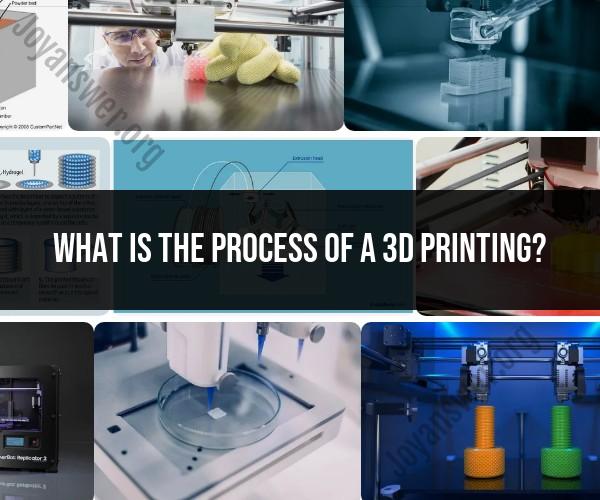
What is the process of a 3D printing?
The process of 3D printing, also known as additive manufacturing, involves creating three-dimensional objects by adding material layer by layer. Here are the basic steps involved in 3D printing:
Design the 3D Model:
- The process begins with the creation of a 3D computer-aided design (CAD) model of the object you want to print. This model serves as a digital blueprint for the 3D printer.
Slice the Model:
- The 3D modeling software used for design slices the digital model into thin horizontal layers, essentially creating a digital representation of each layer the printer will produce. These slices are sometimes called "G-code" or toolpaths.
Choose Printing Material:
- Select the appropriate printing material. 3D printers can work with various materials, including plastics, metals, ceramics, and even biological materials like cells or food.
Prepare the Printer:
- Load the chosen material into the 3D printer's reservoir or extruder.
- Ensure that the printer is calibrated and leveled correctly.
- Set the printing parameters, including layer thickness, print speed, and temperature, based on the material and object being printed.
Printing Process:
- The 3D printer begins the additive manufacturing process by creating the first layer of the object.
- The printer's nozzle or print head moves along the X, Y, and Z axes, following the toolpath generated by the slicing software.
- Material is deposited or solidified layer by layer according to the design until the entire object is complete.
Cooling and Solidification:
- In some cases, as the material is deposited, it may need to cool or solidify before the next layer is added. This depends on the type of material being used.
Support Structures (If Necessary):
- For complex or overhanging parts of the object, the printer may add temporary support structures. These are removed later in post-processing.
Completion:
- Once all layers have been deposited and the object is fully printed, the 3D printer completes the process.
Post-Processing:
- After printing, post-processing steps may be required, depending on the material and the desired finish. This can include removing support structures, sanding, painting, or assembling multiple printed parts.
Quality Control:
- Inspect the printed object for any defects, inaccuracies, or imperfections.
The specific steps and technologies used in 3D printing can vary depending on the type of 3D printer and the material being used. There are various 3D printing techniques, including Fused Deposition Modeling (FDM), Stereolithography (SLA), Selective Laser Sintering (SLS), and more, each with its own unique process and characteristics. The choice of technology and materials depends on the application and the desired properties of the printed object.
The Art of 3D Printing: A Step-by-Step Process Guide
3D printing is a process of creating a physical object from a digital design. It is done by adding material layer by layer until the object is complete. There are many different types of 3D printers, but they all work on the same basic principle.
Step 1: Design the object
The first step in the 3D printing process is to design the object you want to print. This can be done using a variety of 3D design software. Once you have designed the object, you need to save it in a file format that your 3D printer can understand.
Step 2: Slice the object
Once you have designed the object, you need to slice it into thin layers. This is done using a slicing software. The slicing software will generate a G-code file, which is a set of instructions that tells the 3D printer how to print the object.
Step 3: Load the G-code file onto the 3D printer
Once you have generated the G-code file, you need to load it onto the 3D printer. This can be done using a USB drive or a memory card.
Step 4: Start the printing process
Once the G-code file is loaded onto the 3D printer, you can start the printing process. The 3D printer will heat up the material and start printing the object layer by layer.
Step 5: Remove the object from the 3D printer
Once the printing process is complete, you need to remove the object from the 3D printer. This can be done by hand or using a tool.
From Digital Design to Physical Object: The 3D Printing Process
The 3D printing process can be broken down into the following steps:
- Design the object: This can be done using a variety of 3D design software.
- Slice the object: This is done using a slicing software.
- Load the G-code file onto the 3D printer: This can be done using a USB drive or a memory card.
- Start the printing process: The 3D printer will heat up the material and start printing the object layer by layer.
- Remove the object from the 3D printer: This can be done by hand or using a tool.
Turning Ideas into Reality: Understanding the 3D Printing Workflow
The 3D printing workflow is the process of taking a digital design and turning it into a physical object. The workflow can be broken down into the following steps:
- Design: The first step is to design the object you want to print. This can be done using a variety of 3D design software.
- Slicing: Once the object is designed, it needs to be sliced into thin layers. This is done using a slicing software. The slicing software will generate a G-code file, which is a set of instructions that tells the 3D printer how to print the object.
- Printing: Once the G-code file is generated, it is loaded onto the 3D printer and the printing process begins. The 3D printer will heat up the material and start printing the object layer by layer.
- Post-processing: Once the object is printed, it may need to be post-processed. This may involve removing supports, sanding the object, or painting the object.
The 3D printing workflow can vary depending on the type of 3D printer you are using and the materials you are printing with. However, the basic steps are the same for all 3D printers.
3D printing is a powerful tool that can be used to create a wide variety of objects. From simple prototypes to complex finished products, 3D printing can be used to bring your ideas to life.