How to connect webmail to Outlook?
Connecting webmail to Microsoft Outlook allows you to access your email account through the Outlook email client software. Here's a comprehensive guide on how to connect webmail to Outlook:
Note: The specific steps and settings may vary depending on your webmail service provider and version of Outlook. These instructions provide a general overview of the process.
Step 1: Open Microsoft Outlook
- Launch Microsoft Outlook on your computer. If you don't have Outlook installed, you can download and install it from the Microsoft website or use the version that comes with Microsoft Office.
Step 2: Start the Setup Process
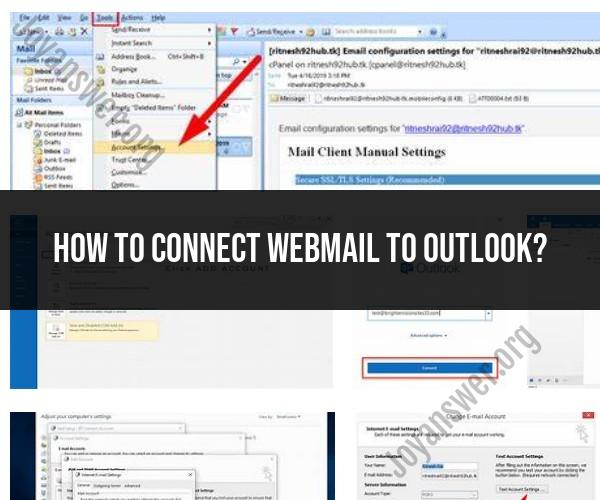
In Outlook, go to the "File" tab or the "Tools" menu, depending on your version of Outlook.
Select "Add Account" or "Add Email Account." This will start the email setup wizard.
Step 3: Choose "Manual Setup" or "Advanced Options"
- In the setup wizard, select "Manual setup" or "Advanced options." This option allows you to manually configure the settings for your webmail account.
Step 4: Choose Email Account Type
- Select the type of email account you want to set up. Choose "POP" (Post Office Protocol) or "IMAP" (Internet Message Access Protocol) based on your webmail service provider's settings. IMAP is typically recommended for syncing emails across devices, while POP may download emails to your computer.
Step 5: Enter Your Account Details
Provide the following information:
- Your Name: Enter your full name as you want it to appear in outgoing emails.
- Email Address: Enter your full webmail email address (e.g., [email protected]).
- Password: Enter the password associated with your webmail account.
Step 6: Configure Server Settings
You'll need to enter the incoming and outgoing server settings for your webmail provider. These settings can usually be found in the documentation provided by your webmail service or by contacting your service provider. The common server settings include:
- Incoming Mail Server (IMAP/POP3): This is the server for receiving emails.
- Outgoing Mail Server (SMTP): This is the server for sending emails.
Step 7: Test Account Settings
- After entering the server settings, click the "Test Account Settings" or "Next" button to allow Outlook to test the configuration. Outlook will check if it can establish a connection with your webmail server.
Step 8: Complete the Setup
- If the tests are successful, Outlook will display a confirmation message. Click "Finish" or "Done" to complete the setup.
Step 9: Access Your Webmail in Outlook
- Your webmail account is now connected to Outlook. You can access your emails, folders, and other features of your webmail account through the Outlook interface.
Step 10: Synchronize Your Emails (IMAP Only)
- If you are using IMAP, your emails will be synchronized between Outlook and your webmail server. Changes made in one will reflect in the other, ensuring your emails are up to date on both platforms.
Note: If you're using a Gmail or Yahoo Mail account, you can often choose the "Gmail" or "Yahoo" account type in Outlook and follow a simplified setup process.
Remember to keep your email account credentials secure and regularly update your password for security purposes.
