What are the rules in isometric drawing?
Isometric drawing is a form of 3D representation that allows objects to be drawn with a more realistic sense of depth than traditional 2D drawings. Here are some rules and guidelines to keep in mind when creating isometric drawings:
30-Degree Angles:
- Isometric drawings are typically created using lines that are at 30-degree angles from the horizontal. This helps maintain the equal scale along each axis and contributes to the balanced appearance of the drawing.
Equal Scaling:
- Objects in an isometric drawing should be drawn to scale. This means that the size of objects along each axis should be proportional and consistent. Pay attention to maintaining equal spacing and sizing to accurately represent the three-dimensional space.
Orthographic Projection:
- Isometric drawings are a type of axonometric projection, where all three axes are equally foreshortened. This differs from perspective drawings, where objects appear smaller as they recede into the distance.
No Foreshortening:
- In isometric drawings, there is no foreshortening of lines. This means that lines parallel to the axes remain the same length, and angles between lines are consistent, contributing to the equal scaling along each axis.
Isometric Grid:
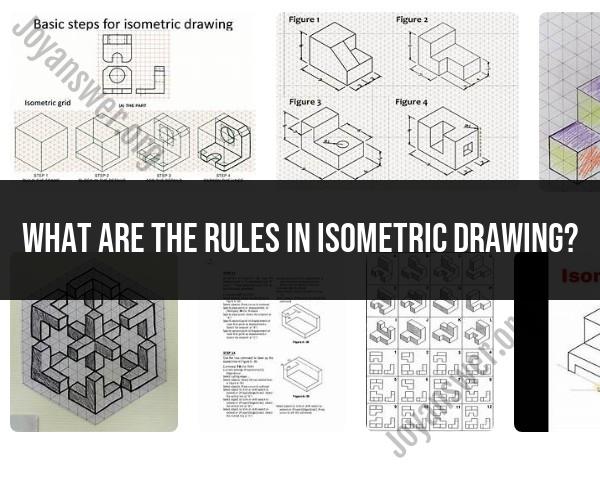
- Some drafters use isometric grid paper to facilitate the drawing process. The grid is made up of equilateral triangles, each with sides at 30-degree angles, providing a guide for maintaining the correct angles in the drawing.
Axes Orientation:
- The three axes in isometric drawings are typically labeled as X, Y, and Z. The X and Y axes are usually horizontal, while the Z axis is vertical. It's essential to maintain the correct orientation to accurately represent the spatial relationships between objects.
Use of Ellipses:
- Circles in isometric drawings appear as ellipses. When drawing circles or cylindrical objects, pay attention to the correct proportion and orientation of the ellipses to convey the three-dimensional shape accurately.
Consistent Lighting and Shading:
- While isometric drawings are generally less concerned with realistic lighting and shading compared to perspective drawings, maintaining consistency in how shadows are drawn can enhance the overall appearance of the drawing.
Annotations and Labels:
- Include annotations, labels, and symbols to provide additional information about the objects in the drawing. This can include dimensions, materials, and other relevant details.
Practice and Precision:
- Creating accurate isometric drawings requires practice and precision. Pay attention to details, use appropriate tools, and take the time to ensure that lines are drawn at the correct angles and lengths.
By adhering to these rules and guidelines, drafters and designers can create clear and accurate isometric drawings that effectively communicate the three-dimensional aspects of objects and spaces.
Sure, here is a breakdown of understanding isometric projection, applying isometric drawing techniques, and utilizing isometric drawing software:
Understanding the principles of isometric projection: Recognizing the key geometric concepts and rules
Isometric projection is a widely used method for representing three-dimensional objects in a two-dimensional plane. It is a type of axonometric projection, which means that the angles between the three coordinate axes remain constant, typically at 120 degrees. This results in a distortion-free representation of the object, where all dimensions are preserved in a consistent scale.
Key Geometric Concepts in Isometric Projection:
Isometric grid: An isometric grid forms the foundation of isometric drawings, consisting of evenly spaced parallel lines at 30 degrees to the horizontal and vertical axes.
Isometric axes: The three coordinate axes in isometric projection are positioned at 120 degrees, creating a distinctive triangular shape.
Isometric foreshortening: Objects in isometric projection appear slightly shorter along their axes parallel to the viewer, but their proportions remain accurate.
Rules of Isometric Projection:
Parallel lines: Parallel lines in three-dimensional space remain parallel in isometric projection.
Angle preservation: Angles in isometric projection remain constant, typically at 120 degrees.
Scale consistency: All dimensions in isometric projection are preserved in a consistent scale.
These geometric concepts and rules form the basis for creating accurate and distortion-free isometric drawings.
Applying isometric drawing techniques: Mastering the techniques for creating accurate and proportional isometric drawings
Isometric drawing involves a set of techniques to accurately represent three-dimensional objects in isometric projection.
Essential Techniques:
Grid construction: Constructing an isometric grid on paper or using CAD software provides a framework for the drawing.
Object placement: Carefully place objects on the isometric grid, aligning them with the grid lines to ensure proper orientation.
Line drawing: Draw lines to represent the edges and contours of the objects, following the isometric projection rules.
Dimensioning: Add dimensions to specify the lengths, widths, and heights of the objects.
Symbol usage: Utilize standardized symbols for common objects, such as doors, windows, and furniture.
Utilizing isometric drawing software: Exploring tools and techniques for creating isometric drawings using digital tools
Isometric drawing software offers powerful tools and techniques for creating precise and visually appealing isometric drawings.
Common Software Applications:
AutoCAD: A widely used CAD software with extensive isometric drawing capabilities.
SketchUp: A user-friendly design software that includes isometric drawing tools.
FreeCAD: An open-source CAD software with various isometric drawing features.
Essential Tools and Techniques:
Isometric grid tools: These tools allow for easy grid creation and manipulation.
Object snapping: Snapping objects to grid intersections ensures accurate placement.
Line drawing tools: Specialized tools for drawing straight, curved, and angled lines in isometric projection.
Dimensioning tools: Dimensioning tools automate the process of adding dimensions to the drawing.
Symbol libraries: Access to standardized symbols for various objects simplifies the drawing process.
By mastering these techniques and utilizing isometric drawing software, individuals can create accurate, proportional, and visually appealing isometric drawings.
