How to create a logo for free in word?
Microsoft Word is primarily a word processing program, and it's not the ideal tool for creating professional logos. However, if you're looking to create a simple, basic logo for personal use or a non-commercial project, you can use Word's drawing tools to design something basic. Here's a basic guide to creating a simple logo in Word:
Open Microsoft Word: Launch Microsoft Word on your computer.
Set up your canvas: Go to the "Layout" or "Page Layout" tab and adjust the page size to your desired logo size. You can choose a custom page size or select from standard paper sizes.
Insert Shapes: Go to the "Insert" tab, then click on "Shapes." You can choose from various shapes like rectangles, circles, lines, etc. You can use these shapes as building blocks for your logo.
Customize Shapes: Once you insert a shape, you can customize it by changing its fill color, outline color, and other formatting options. Right-click on the shape and select "Format Shape" to access these options.
Combine Shapes: You can create more complex shapes by combining and overlapping basic shapes. For example, you can create a simple logo by combining circles, rectangles, and lines.
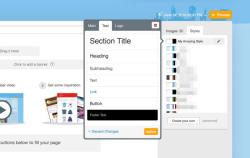
Add Text: You can also add text to your logo using Word's text tools. Click on "Insert" and choose "Text Box" to insert a text box. Type your text and customize its font, size, and color.
Arrange and Align: To ensure your logo elements are properly aligned, use Word's alignment and arrangement tools. You can access these options by right-clicking on an element and choosing "Format" or "Format Shape."
Save your Logo: Once you're satisfied with your logo, you can save it as an image. To do this, right-click on your logo, copy it, and then paste it into an image editing program or use the "Save as Picture" option in Word to save it as an image file (e.g., JPEG or PNG).
It's important to note that the design capabilities in Word are quite limited compared to dedicated graphic design software like Adobe Illustrator or even online logo design tools. If you need a professional or high-quality logo for a business or commercial use, it's advisable to consider using a dedicated logo design tool or hiring a professional graphic designer.
Creating a basic logo in Word can be a simple and cost-effective solution for personal projects or experimentation, but for a more polished and professional result, you should explore other design options.
Designing a logo without cost: A step-by-step guide in Microsoft Word
While graphic design software is often the go-to choice for creating logos, Microsoft Word can also be a surprisingly effective tool for designing simple yet professional-looking logos. With its user-friendly interface and a wide range of shapes, fonts, and colors, Word offers a cost-effective alternative for creating basic logos.
Step-by-Step Guide to Creating a Logo in Microsoft Word
Open a New Document: Start by opening a new blank document in Microsoft Word. This will be your workspace for creating your logo.
Choose a Shape: From the "Insert" tab, select the "Shapes" icon. This will open a gallery of various shapes that you can use as the base for your logo. Choose a shape that aligns with your logo's concept or brand identity.
Format the Shape: Once you've selected a shape, you can format it to customize its appearance. Use the "Shape Styles" pane to adjust the shape's fill color, border, and line weight. You can also experiment with different shape effects, such as shadows, bevels, and glows.
Add Text: To incorporate text into your logo, click inside the shape and start typing. You can change the font style, size, and color using the Font options in the "Home" tab. Adjust the text positioning and alignment as needed.
Add Additional Shapes: If your logo requires more than one shape, you can insert additional shapes from the "Shapes" gallery. Arrange the shapes to create a cohesive design.
Group Objects: To group the shapes and text together, select all the elements by clicking and dragging the cursor around them. Then, right-click and choose "Group." This will prevent the elements from moving or resizing independently.
Save as an Image: Once you're satisfied with your logo's design, save it as an image file. Click "File" > "Save As" and choose the desired image format, such as PNG or JPEG.
Utilizing Word's features for logo creation on a budget
Microsoft Word offers several features that can be leveraged to create professional-looking logos without the need for expensive graphic design software:
Shape Styles: Word provides a variety of pre-designed shape styles that can add visual interest and enhance your logo's appearance.
Text Effects: You can apply text effects like shadows, embossing, and outlines to make your logo's text stand out.
Alignment and Layout Tools: Word's alignment and layout tools help you precisely position and arrange the shapes and text elements within your logo.
Tips for creating a professional-looking logo for free
Even with limited resources, you can create a professional-looking logo using Microsoft Word:
Choose a Consistent Color Scheme: Limit your logo's color palette to a few complementary colors to maintain a professional and cohesive look.
Use Simple Shapes: Avoid overly complex shapes that might appear cluttered or unprofessional. Opt for clean and straightforward shapes that convey your brand's message effectively.
Ensure Readability: Ensure the text in your logo is easy to read from a distance and in different sizes. Use a legible font and avoid excessive text.
Maintain Balance: Strive for balance in the arrangement of shapes and text elements. The layout should be visually appealing and harmonious.
Seek Feedback: Ask for feedback from colleagues or friends to identify areas for improvement in your logo design.
Remember, simplicity and clarity are key when designing a logo. A well-designed logo should be memorable, recognizable, and effectively represent your brand. By utilizing Microsoft Word's features and following these tips, you can create a professional-looking logo without incurring any additional costs.