How do I create a blank invoice?
Creating a blank invoice is a straightforward process that you can do using various tools, including word processors like Microsoft Word or Google Docs, spreadsheet software like Microsoft Excel or Google Sheets, or dedicated invoicing software or templates. Here's a step-by-step guide to creating a blank invoice:
Method 1: Using Word Processing Software (e.g., Microsoft Word or Google Docs)
Open your Word Processing Software:
- Launch Microsoft Word or Google Docs on your computer.
Set Up a Blank Document:
- Create a new, blank document.
Add Your Business Information:
- Include your business name, address, phone number, and email at the top of the document. You can format this information as you like.
Include an Invoice Title:
- Center-align and bold the text "INVOICE" or "Invoice" at the top of the page to make it clear that this is an invoice.
Add Invoice Details:
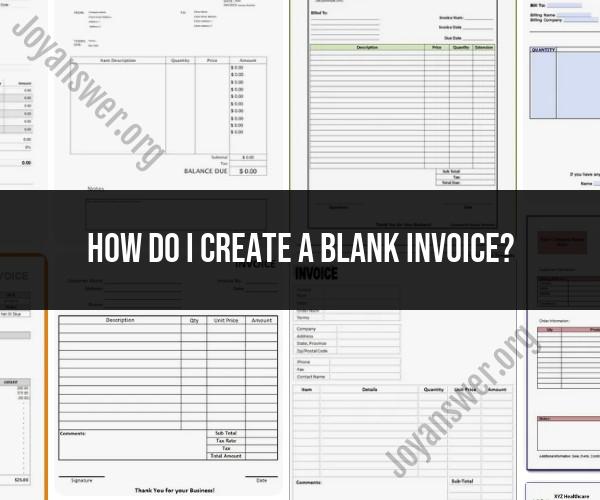
- Below the title, create a table with columns for the following details:
- Date of the invoice
- Invoice number (a unique identifier for your invoice)
- Due date (the date by which the payment should be made)
- Bill-to (the client's name and address)
- Ship-to (if applicable)
- Description of goods or services provided
- Quantity
- Unit price
- Total amount for each item or service
- You can customize the table layout and appearance as needed.
- Below the title, create a table with columns for the following details:
Calculate Totals:
- Use formulas (if using spreadsheet software) or manually calculate the total amount, any taxes, and the grand total.
Include Payment Information:
- Add your preferred payment methods (e.g., bank account details, PayPal information) and payment instructions for your client.
Add Additional Notes or Terms:
- Include any additional notes, terms, or conditions relevant to the invoice or payment process.
Save and Send:
- Save the document to your computer, and then you can either print it and send a hard copy to your client or save it as a PDF and email it to them.
Method 2: Using Spreadsheet Software (e.g., Microsoft Excel or Google Sheets)
Open your Spreadsheet Software:
- Launch Microsoft Excel or Google Sheets.
Set Up a Blank Spreadsheet:
- Create a new, blank spreadsheet.
Design Your Invoice:
- Design your invoice layout by creating rows and columns for the same details mentioned in steps 3 to 8 of the word processing method above. You can format cells, add borders, and customize the appearance as needed.
Calculate Totals:
- Use spreadsheet formulas to calculate totals, taxes, and the grand total.
Add Payment Information and Notes:
- Include payment information, additional notes, and terms in specific cells or sections of the spreadsheet.
Save and Send:
- Save the spreadsheet to your computer and save it as a PDF if you want to email it to your client. Alternatively, you can print it and send a hard copy.
Method 3: Using Invoicing Software or Templates:
Use Invoicing Software:
- Consider using dedicated invoicing software or online platforms like QuickBooks, FreshBooks, or Zoho Invoice. These tools often provide pre-designed invoice templates that you can customize.
Fill in Your Information:
- Sign up or log in to the invoicing software.
- Enter your business information in the provided fields.
- Follow the software's instructions to create a new invoice.
- Fill in the required details, including client information, invoice items, and payment information.
- Customize the template to match your branding if necessary.
Save and Send:
- Save the invoice within the software, and you can usually send it directly to your client via email or download it as a PDF for printing or emailing.
Creating a blank invoice is relatively simple, and you can choose the method that best suits your needs and preferences. Invoicing software often streamlines the process and provides additional features for tracking payments and managing your finances.
Crafting a Professional Blank Invoice: A Comprehensive Tutorial
To craft a professional blank invoice, you should include the following essential elements:
- Your business information: This includes your business name, address, phone number, email address, and website address.
- Your client's information: This includes your client's name, address, phone number, and email address.
- Invoice number: This is a unique number that you assign to each invoice.
- Date: This is the date that you created the invoice.
- Due date: This is the date by which your client must pay the invoice.
- Itemized list of goods or services: This includes a description of each item, the quantity, the unit price, and the total price.
- Subtotal: This is the total amount of the invoice before taxes and discounts.
- Taxes: This is the amount of taxes that apply to the invoice.
- Discounts: This is the amount of any discounts that apply to the invoice.
- Total: This is the total amount that your client must pay, including taxes and discounts.
You can use a variety of different software programs to create blank invoices, such as Microsoft Word, Google Docs, or Excel. You can also find many free and paid invoice templates online.
Here are some additional tips for crafting a professional blank invoice:
- Use a clear and concise font.
- Use a consistent format throughout the invoice.
- Proofread the invoice carefully before sending it to your client.
- Consider using a logo or other branding elements on your invoice.
Customizing Invoice Details and Layout for Your Business
Once you have created a blank invoice template, you can customize it to fit the specific needs of your business. For example, you may want to add additional fields to track inventory, shipping, or payment terms. You may also want to change the layout or design of the invoice to match your branding.
Here are some tips for customizing your invoice details and layout:
- Use your business logo and other branding elements on your invoice.
- Use a font and font size that is easy to read.
- Use a consistent format throughout the invoice.
- Use clear and concise language.
- Highlight important information, such as the due date and payment terms.
- Make sure that the invoice is easy to print and save.
Managing and Tracking Blank Invoices for Efficient Financial Records
Once you have created and customized your blank invoice template, you need to develop a system for managing and tracking your invoices. This will help you to keep track of your income and expenses, and it will make it easier to prepare your taxes at the end of the year.
Here are some tips for managing and tracking your blank invoices:
- Create a system for numbering your invoices consecutively.
- Keep track of all of your invoices in a spreadsheet or database.
- Send invoices to your clients promptly after you have completed the work or delivered the goods.
- Follow up with clients who have not paid their invoices on time.
- Keep copies of all of your invoices for your records.
You can also use a variety of software programs to help you manage and track your invoices. Some popular options include QuickBooks Online, Xero, and FreshBooks.
By following these tips, you can create professional blank invoices that will help you to manage your finances efficiently and effectively.


