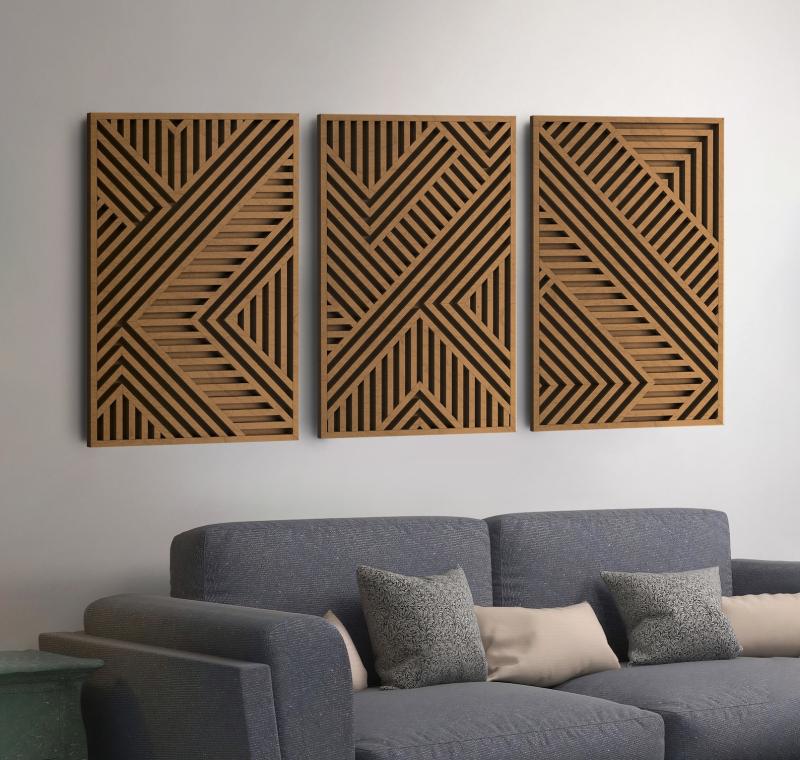
How to make geometric wood wall art?
Creating geometric wood wall art can be a rewarding and artistic endeavor. Here's a step-by-step guide to help you get started:
Materials and Tools:
Wooden Boards:
- Choose wood boards of your preferred type and size. Common choices include plywood, pine, or reclaimed wood.
Measuring Tools:
- Ruler, tape measure, and a square to ensure accurate measurements and angles.
Cutting Tools:
- Circular saw, jigsaw, or handsaw for cutting the wood to the desired shapes.
Sandpaper:
- Various grits for smoothing the edges and surfaces of the wood.
Wood Glue:
- High-quality wood glue for joining pieces together.
Clamps:
- Clamps to hold pieces together while the glue dries.
Wood Stain or Paint:
- Choose a finish that complements your design. Stain enhances the natural wood grain, while paint allows for more color options.
Protective Finish (Optional):
- Polyurethane or another clear protective finish can be applied to protect and preserve the wood.
Hanging Hardware:
- Picture hangers or D-ring hangers, depending on the weight and size of your artwork.
Steps:
Design Your Pattern:
- Plan your geometric design. You can use software like Adobe Illustrator or even draw your design on paper. Consider the sizes and angles of the geometric shapes.
Select and Prepare the Wood:
- Choose the wood for your project and cut it into the desired sizes and shapes. Sand the edges and surfaces for a smooth finish.
Assemble the Pieces:
- Lay out your design on a flat surface before gluing. Apply wood glue to the edges, press the pieces together, and use clamps to secure them while the glue dries. Follow the glue manufacturer's recommendations for drying time.
Sand Again if Necessary:
- Once the glue is fully dried, sand the entire piece again to ensure a seamless and smooth surface.
Apply Finish:
- Apply your chosen finish (stain or paint) to the wood. Follow the instructions on the product for application and drying times.
Protective Finish (Optional):
- If desired, apply a clear protective finish over the stain or paint to protect the wood and enhance its longevity.
Attach Hanging Hardware:
- Attach the appropriate hanging hardware to the back of your piece. Ensure it is securely fastened and capable of supporting the weight of the artwork.
Hang Your Artwork:
- Find the perfect spot on your wall and hang your geometric wood art. Use a level to ensure it hangs straight.
Tips:
Experiment with different wood finishes to achieve the desired aesthetic. You can also combine painted and natural wood elements for a more dynamic look.
Consider adding depth to your piece by using wood pieces of varying thicknesses.
Practice safety precautions when using cutting tools. Wear protective gear, such as safety glasses and gloves.
If you're new to woodworking, start with a simpler design before attempting more complex geometric patterns.
This DIY project allows for creativity and personalization, so feel free to adapt the steps and materials to suit your vision for the geometric wood wall art.
Gathering Materials:
- Wood pieces: Select the type of wood that best suits your project, considering factors like durability, appearance, and ease of working with. Popular choices for geometric wood projects include pine, maple, and oak.
- Saw: A hand saw or a power saw will be needed for cutting the wood pieces to the desired dimensions. For intricate shapes, a jigsaw or scroll saw may be more suitable.
- Drill: A drill is essential for creating holes for joining the wood pieces and for attaching any decorative elements.
- Sandpaper: Sandpaper of varying grits will be used to smoothen the rough edges of the wood pieces and create a polished finish.
- Paint or stain: Choose a paint or stain that complements the wood's natural beauty or adds a bolder color statement to your project.
- Adhesive: Choose an appropriate adhesive for joining the wood pieces, considering factors like strength, durability, and ease of use. Wood glue, epoxy, or liquid nails are common options.
Designing and Sketching Geometric Patterns:
- Create templates: Templates provide a precise pattern for cutting the wood pieces to the desired shapes. You can design your own templates or use pre-made ones available online or in craft stores.
- Use stencils: Stencils are particularly useful for creating designs with intricate details or repeating patterns. You can create your own stencils using thin cardboard or plastic sheets.
Cutting and Shaping Wood Pieces:
- Marking the wood: Carefully mark the cutting lines on the wood pieces using a pencil or a marking tool. Ensure the lines are straight and precise for accurate cuts.
- Using woodworking techniques: Apply the appropriate woodworking techniques to cut the wood pieces to the desired shapes and dimensions. This may involve using hand saws, power saws, jigsaws, or scroll saws depending on the complexity of the pattern.
- Smoothing edges: Once the wood pieces are cut, use sandpaper to smoothen the rough edges and create a clean finish. This will ensure a polished and professional look to your geometric wood project.


