How to install vinyl decals on a car?
Installing vinyl decals on a car can be a fun and creative way to personalize your vehicle. Here's a step-by-step guide on how to do it:
Materials You'll Need:
- Vinyl decal
- Squeegee or credit card
- Masking tape or painter's tape
- Isopropyl alcohol and a clean cloth
- Measuring tape or ruler
- Scissors or a utility knife
- Application fluid or a mixture of water and a few drops of dish soap
Step-by-Step Installation:
Clean the Surface:
- Start by cleaning the area of your car where you intend to place the vinyl decal. Use isopropyl alcohol and a clean cloth to remove any dirt, dust, or wax. This step is crucial to ensure good adhesion.
Position the Decal:
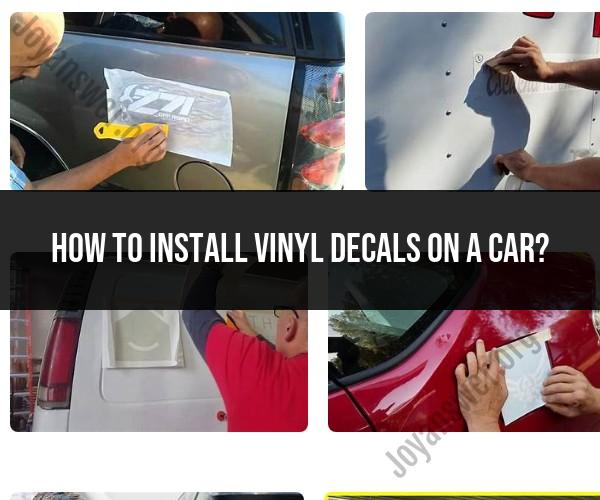
- Before peeling off the backing, use masking tape to temporarily hold the decal in the desired position on your car. Adjust it until you're satisfied with the placement.
Measure and Align:
- Use a measuring tape or ruler to ensure the decal is centered and aligned correctly. This step is essential for a professional look.
Create a Hinge:
- Once you're satisfied with the placement, create a hinge by applying a piece of masking tape horizontally across the top of the decal. This hinge allows you to flip the decal up for easy removal of the backing.
Peel Backing Paper:
- Carefully peel back a portion of the backing paper (usually about 1-2 inches) from the top of the decal, exposing the adhesive side.
Spray Application Fluid:
- If you're not using application fluid, you can create your own mixture by adding a few drops of dish soap to water. Spray this solution on the adhesive side of the decal.
Apply the Decal:
- Carefully lower the decal onto the car's surface, using the hinge as a pivot point. The application fluid will allow you to slide and adjust the decal's position as needed.
Squeegee Out Air Bubbles:
- Starting from the center of the decal, use a squeegee or a credit card to smooth out the vinyl, working your way outward. This step helps remove air bubbles and ensures good adhesion.
Remove the Backing Paper:
- Once the decal is smoothly applied, peel off the remaining backing paper. Do this slowly and at a sharp angle to avoid lifting the decal.
Smooth Out Wrinkles:
- If you notice any wrinkles or bubbles, carefully lift that portion of the decal and reapply it, smoothing it out with the squeegee.
Remove Application Fluid:
- After you're satisfied with the placement, use a squeegee to remove any excess application fluid. Work from the center outward to push out any trapped air or fluid.
Let It Dry:
- Allow the decal to dry for at least 24 hours. Avoid washing your car during this time to ensure proper adhesion.
Additional Tips:
- Do this installation in a clean, dust-free environment to minimize the risk of particles getting trapped under the decal.
- If you're applying a large decal, it can be helpful to have a friend assist you with positioning and smoothing.
- Some vinyl decals come with transfer tape, which can make the installation process easier.
- If you're concerned about making a mistake, you can practice the installation on a small section of vinyl or a similar surface before applying it to your car.
Properly installed vinyl decals can enhance the appearance of your car and allow for creative expression. If you're unsure about the process, consider seeking professional installation to ensure a flawless result.
How to properly install vinyl decals on a car
Gather your tools and materials. You will need:
- Vinyl decals
- A clean, dry surface to work on
- A squeegee or credit card
- A spray bottle with soapy water
- A sharp knife
- Paper towels
Clean the surface where you will be applying the decal. Make sure the surface is free of dirt, dust, and grease. You can use a mild soap and water solution to clean the surface. Once the surface is clean, dry it thoroughly with a paper towel.
Peel the backing off of the decal. Be careful not to touch the adhesive side of the decal.
Place the decal on the surface where you want to apply it. Use the squeegee or credit card to smooth out the decal and remove any air bubbles.
Trim any excess vinyl with the sharp knife.
Allow the decal to dry completely. This may take several hours.
Tips for ensuring a smooth and bubble-free application:
- Make sure the surface you are applying the decal to is clean, dry, and smooth.
- Use a squeegee or credit card to smooth out the decal and remove any air bubbles.
- Apply the decal in a warm environment. The adhesive will be more pliable and easier to work with in warm weather.
- If you get a bubble, you can use a sharp needle to prick it and then smooth it out with the squeegee or credit card.
Precautions to prevent damage to the car's paint:
- Avoid applying decals to areas of the car that are exposed to direct sunlight for extended periods of time. The heat from the sun can cause the adhesive to fail and the decal to peel off.
- Do not apply decals to areas of the car that are frequently washed or waxed. The harsh chemicals in car wash soaps and waxes can damage the decal.
- If you need to remove a decal, use a heat gun or hair dryer to soften the adhesive. Then, carefully peel the decal off. You may need to use a solvent to remove any remaining adhesive residue.
With proper care, vinyl decals can last for several years. By following these tips, you can ensure a smooth and bubble-free application that will not damage your car's paint.


