How to remove vehicle emblem?
Removing a vehicle emblem can be done with some patience and the right tools. Here are step-by-step instructions to help you remove a vehicle emblem:
Tools and Materials Needed:
- Heat gun or hair dryer
- Fishing line or dental floss
- Plastic trim removal tools or plastic credit card
- Goo Gone or adhesive remover
- Microfiber cloth
- Wax or polish (optional)
- Rubbing alcohol (optional)
Step 1: Gather Supplies and Safety Precautions:
- Make sure you have all the necessary tools and materials. Ensure your vehicle is parked in a safe and well-ventilated area.
Step 2: Warm the Emblem:
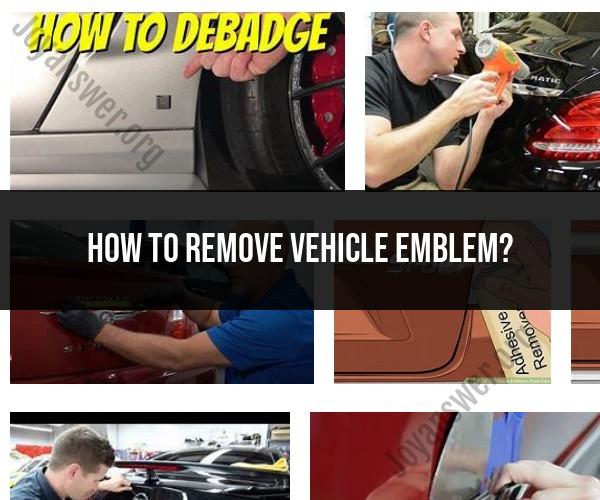
- Use a heat gun or a hair dryer on its highest setting to warm the area around the emblem for about 2-3 minutes. The heat will soften the adhesive behind the emblem, making it easier to remove.
Step 3: Start with Fishing Line or Dental Floss:
- Carefully slide a piece of fishing line or dental floss behind the emblem. Use a back-and-forth sawing motion to work the line through the adhesive. Be gentle to avoid scratching the vehicle's paint.
Step 4: Gently Pry the Emblem:
- Once you have worked the line or floss through the adhesive, gently pry the emblem away from the vehicle's surface using plastic trim removal tools or a plastic credit card. Start at one corner and gradually work your way around the emblem.
Step 5: Remove Adhesive Residue:
- After removing the emblem, you may have some adhesive residue left on the vehicle's surface. Apply an adhesive remover like Goo Gone to a microfiber cloth and gently rub the residue in a circular motion. Continue until all adhesive is gone. Be cautious not to damage the paint.
Step 6: Clean the Area:
- Clean the area thoroughly with a mild car wash soap and water to remove any remaining residue or cleaner. Rinse and dry the area.
Step 7: Optional Finishing Touches:
- If there are any marks or imperfections on the paint, consider using rubbing alcohol to clean the area. You can also apply wax or polish to the spot to restore the paint's shine.
Step 8: Final Inspection:
- Carefully inspect the area to ensure all adhesive and residue are removed, and the paint is in good condition.
Please note that removing an emblem may reveal a slightly different shade of paint underneath due to the sun fading the exposed area. Additionally, if you're uncomfortable with this process or concerned about potential damage to your vehicle's paint, it's advisable to seek professional assistance from an auto body shop or detailing service.
Removing a Vehicle Emblem: Step-by-Step Guide to a Clean Finish
Removing a vehicle emblem can be a simple task, but it's important to do it carefully to avoid damaging your car's paint. Here's a step-by-step guide:
- Clean the area around the emblem. Use a mild soap and water solution to remove any dirt or debris. This will help to prevent scratches when you're removing the emblem.
- Heat the emblem. Use a hair dryer or heat gun to soften the adhesive that's holding the emblem in place. This will make it easier to remove without damaging the paint.
- Use a dental floss or fishing line to remove the emblem. Gently work the floss or fishing line behind the emblem to saw through the adhesive. Be careful not to scratch the paint.
- Remove the adhesive residue. Once the emblem is removed, use a mild adhesive remover to remove any remaining adhesive residue.
- Wax the area. Once the adhesive residue is removed, wax the area to protect the paint.
DIY Badge Removal: How to Take Off a Vehicle Emblem Safely
Here are some additional tips for safely removing a vehicle emblem:
- Use a plastic pry tool or a plastic credit card to remove the emblem. This will help to prevent scratches.
- If the emblem is difficult to remove, heat it for a longer period of time.
- Be careful not to overheat the emblem, as this could damage the paint.
- If you're using a heat gun, be careful not to hold it too close to the paint.
- If you're using a chemical adhesive remover, be sure to follow the instructions on the product label.
From Logo to Clean Slate: Techniques for Removing Car Emblems
There are a few different techniques that you can use to remove a car emblem. The best technique for you will depend on the type of emblem and the type of adhesive that is used to hold it in place.
Here are some of the most common techniques:
- Heat and floss: This is the most common technique for removing car emblems. To use this technique, you will need a hair dryer or heat gun and a piece of dental floss or fishing line. Heat the emblem until the adhesive is softened, then use the floss or fishing line to saw through the adhesive and remove the emblem.
- Adhesive remover: You can also use an adhesive remover to remove a car emblem. Be sure to follow the instructions on the product label carefully.
- Plastic pry tool: If the emblem is difficult to remove, you can use a plastic pry tool to help you remove it. Be careful not to scratch the paint with the pry tool.
Once you have removed the emblem, you will need to remove any remaining adhesive residue. You can use a mild adhesive remover to do this. Be sure to wax the area after you have removed the adhesive residue to protect the paint.
Please note: Some vehicle emblems may be difficult or impossible to remove without damaging the paint. If you are unsure about how to remove an emblem, it is best to consult with a professional.


